Setup Snowflake Connections
Once you have your application set up, you shall now be free to access the application and to setup the connections.
Grant access to a warehouse
To grant application access to a warehouse, you need to run the following script in an SQL Worksheet:
GRANT USAGE ON WAREHOUSE <name_of_warehouse> TO APPLICATION <application_name>;
This provides your application access to the warehouse of your choosing
Grant access to your data
By default, your causaLens Studio Snowflake App will not have access to your tables and you will need to provide it on a per-table basis. To do so, you can follow the script below.
GRANT USAGE ON DATABASE <database_name> TO APPLICATION <application_name>;
GRANT USAGE ON SCHEMA <database_name>.<schema_name> TO APPLICATION <application_name>;
GRANT INSERT, UPDATE, DELETE, SELECT ON TABLE <database_name>.<schema_name>.<table_name> TO APPLICATION <application_name>;
This gives you access to the database, schema and tables specified. If you want to grant access to the whole database, you can use:
GRANT ALL ON DATABASE <database_name> TO APPLICATION <application_name>;
To read more about what privileges you can grant in snowflake, here's a handy guide to what can be granted on different objects.
View available connections in the application
This now allows you to use the connection object inside the application.
In your causaLens Studio Application, you can click Connections on the side panel which should open the Connections Sidebar.
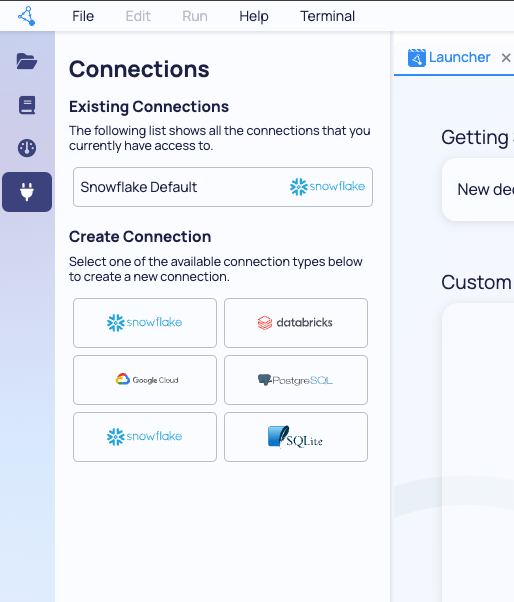
CausaLens Studio on Snowflake is set-up to have a Default Snowflake connection based on how it was configured during the Snowflake Setup.
This connection is available in the Connections Sidebar on the left, and can also be used programmatically.
You can open the connection to change values such as your default database or schema.
Use a connection inside a decision book
Create a decision book
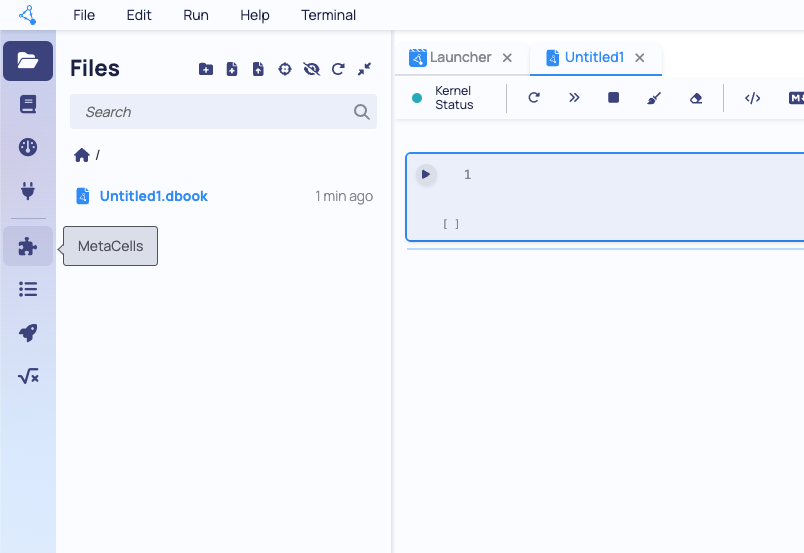
To use a connection inside a decision book, we will take use of a Metacell, which is a building block of the causaLens studio application.
Metacells should be available to you as you create a new decision book, which you can create by clicking the New decisionBook button in the Launcher Page.
Open the Metacell Sidebar
This should now unlock a few more sidebar items for you, including a Metacell Sidebar.
Inside this sidebar, there should be a Metacell named Connection Selector. Click on it to load the metacell to the notebook.
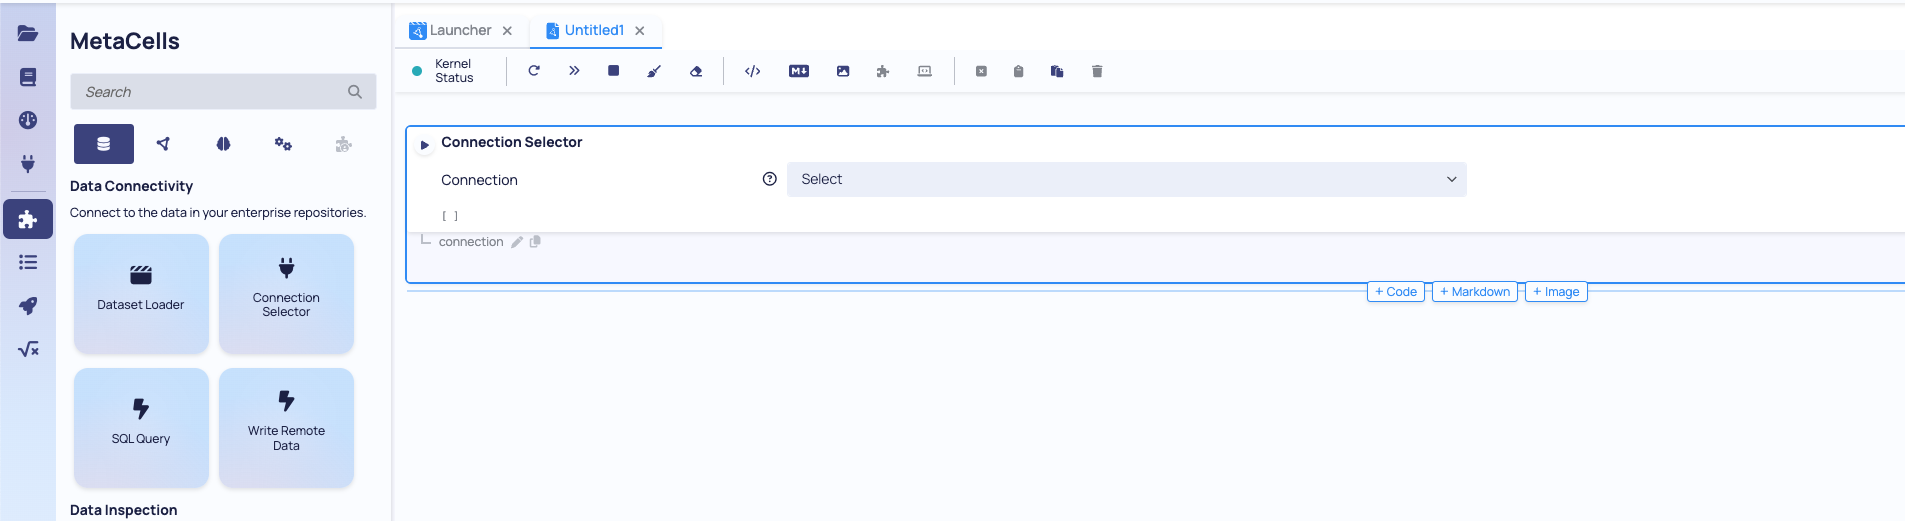
Once the metacell is loaded, select the Snowflake Default connection in the dropdown, then run the metacell.
This should then return an object named connection. This will be what you will use to connect to different items in the database.
Set the connection warehouse
You must first provide access to a connection warehouse. To do this, write and execute this inside a code cell.
connection.data.warehouse = "YOUR_WAREHOUSE_NAME"
This should be the same warehouse that the application has been granted usage to.
Use the connection
You can now use the connection to query in your database, i.e.:
# Pull the whole table
data_ref = connection.data.get(table='<DATABASE_NAME>.<SCHEMA_NAME>.<TABLE_NAME>')

# Or pull a query from the database
data_ref = connection.data.get('SELECT * FROM <DATABASE_NAME>.<SCHEMA_NAME>.<TABLE_NAME>')
You will notice that these calls both return immediately irrespective of the size of the dataset being pulled. This is because the calls are lazy and return a reference to the dataset and how to connect to it rather than fetching that data itself. The class is a thin wrapper around a polars.LazyFrame so you get the entire polars api at your disposal.